I’m excited to share my experience on growing herbs at home. I’ve put together a comprehensive guide to help you get started. With these tips, you’ll enjoy fresh and flavorful herbs all year round. You’ll also discover the joy of having a thriving herb garden in your backyard.
Learning to grow herbs at home is fun and rewarding. I’m happy to share my knowledge with you. I’ll cover everything from choosing the right herbs to harvesting and preserving. You’ll get the best tips to ensure your success.
Whether you’re a beginner or an experienced gardener, my guide has you covered. It will help you create a beautiful and thriving herb garden. So, let’s get started and explore the world of herb gardening together!
Why I Love Growing Herbs at Home
Growing herbs at home is a passion of mine. I love the fresh flavors and aromas they bring. Plus, I enjoy the many benefits of indoor herb gardening. It’s rewarding and something I look forward to every day.
Some of the benefits of growing herbs at home include:
- Fresh flavors and aromas year-round
- Cost-effective alternative to buying herbs at the store
- Control over the growing conditions and care of my herbs
Having fresh herbs whenever I need them is a big plus. Whether cooking or adding freshness to dishes, it’s easy with indoor herbs. With practice and patience, anyone can enjoy these benefits.

Benefits of Fresh Herbs
Fresh herbs change the game in cooking. They add flavor and health benefits. They can reduce inflammation and boost the immune system, making meals healthier.
Cost-Effective Gardening
Growing herbs indoors saves money, especially in small spaces. It cuts down on grocery bills and lets me grow my own food. With proper care, my herbs keep thriving, offering fresh flavors all year.
Enhancing Flavor in Cooking
Growing herbs indoors boosts my cooking’s flavor. Whether it’s a stew or salad, fresh herbs make a big difference. Growing my own lets me try new flavors and recipes, using the freshest ingredients.
Choosing the Right Herbs for My Space
Starting with herb gardening can be tough. There are so many herbs to choose from. It’s key to pick ones that are easy to care for and fit well in your space. You need to think about lighting, temperature, and moisture levels for herb care at home.
Beginners should start with herbs like basil, mint, and cilantro. They’re easy to grow and taste great in many dishes. You can also try medicinal herbs like chamomile and lavender for their health benefits.
Popular Culinary Herbs
- Basil: a classic choice for pesto and caprese salads
- Mint: perfect for refreshing drinks and desserts
- Cilantro: adds flavor to Mexican and Asian dishes
Medicinal Herbs to Consider
Herbs like chamomile and lavender have been used for centuries. Chamomile helps you relax, while lavender fights infections and reduces swelling. Adding these herbs to your garden can bring health benefits right to your home.

Where to Grow My Herbs: Indoor vs. Outdoor
Deciding where to grow your herbs at home is key. You can make a great garden indoors or outdoors with the right tools. I’ll share the pros of each and offer tips to start.
If you have little space, indoor gardening is perfect. It lets you enjoy fresh herbs all year and control the environment. Some top herbs for indoors are:
- Basil
- Mint
- Cilantro
- Parsley
- Chives
Top Indoor Herb Varieties
These herbs grow well indoors with the right light and care. It’s important to know what each needs, like light, water, and food.
Setting Up an Outdoor Garden
Outdoor gardens are great for more space. Choose a sunny spot with good drainage. With the right tools, your outdoor garden will flourish.

Essential Supplies for Herb Gardening
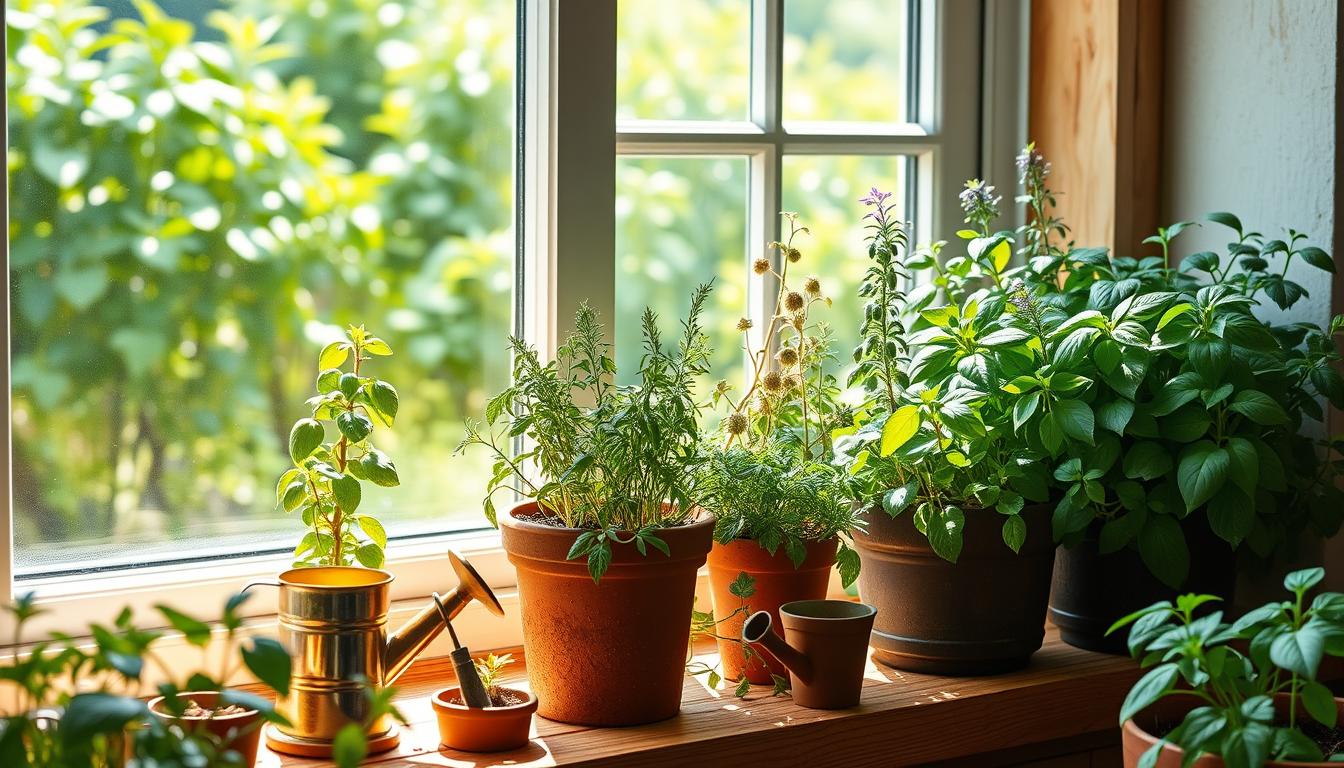
Starting a herbal garden is exciting, but you need the right tools. You’ll need to pick the right containers, pots, and soil. I’ll show you what you need to get started.
Choosing the right containers and pots is key. You can pick from clay, plastic, or wood. Make sure they have good drainage holes to avoid soggy soil. Start with small containers and grow into bigger ones as your herbs get bigger.
Containers and Pots
- Clay pots: breathable and suitable for most herbs
- Plastic pots: lightweight and easy to clean
- Wooden planters: add a rustic touch to your garden
Soil Types that Work Best
For soil, choose something that drains well and is full of nutrients. A potting mix made for herbs is perfect. Adding compost can also make the soil better. With the right supplies, you’ll have a great herbal garden in no time.

| Soil Type | Characteristics |
|---|---|
| Potting Mix | Well-draining, nutrient-rich |
| Compost | Organic, improves soil fertility |
| Garden Soil | May require additional nutrients |
How to Start Seeds for My Herbs
Starting seeds for my herbs is a fun and rewarding experience. With the right tips, I can successfully start my herb seeds indoors. First, I need to pick the right seeds for my indoor garden. This means choosing seeds that grow well indoors.
I think about the type of herb, how fast it grows, and how much light it needs. Some herbs, like basil and mint, grow well in low light. Others, like rosemary and thyme, need more light and should be near a sunny window.
Seed Selection Process
When picking seeds, I look for ones labeled as “indoor” or “container” varieties. These seeds are made to grow well indoors and produce tasty herbs. I also check the size of the seeds, as some herbs have bigger seeds that are easier to handle.
Germination Tips
To make sure seeds germinate well, I follow a few tips. First, I keep the soil moist but not too wet. Then, I plant the seeds at the right depth and give them enough light. For most herbs, this means placing seeds on the soil surface or covering them lightly with soil. With the right tips and patience, I can enjoy fresh herbs from my indoor garden.
- Choose high-quality seeds suitable for indoor growing conditions
- Consider factors such as growth rate, lighting requirements, and seed size
- Follow proper germination techniques, including soil moisture and light
Transplanting Seedlings into Larger Pots
As a beginner in herb gardening, I’ve learned a key step is transplanting seedlings into larger pots. This gives my herbs the space they need to grow well. Transplanting at the right time helps prevent root bound and promotes healthy growth.
For beginner herb gardening, knowing when to transplant seedlings is crucial. Seedlings are ready when they have 2-3 sets of leaves, usually 1-2 weeks after germination. I handle the seedlings gently to avoid shocking them.
When to Transplant
- Check for 2-3 sets of leaves on the seedling
- Wait 1-2 weeks after germination
- Handle seedlings gently to avoid root disturbance
Caring for Young Plants
After transplanting, I make sure my young plants get the right light, water, and nutrients. Growing herbs indoors requires attention to these details. With proper care, my herbs thrive and provide fresh flavors all year.
Watering Techniques for Healthy Herbs
Watering is key to keeping herbs healthy at home. I must know what each herb needs. This varies, so I research each one’s specific needs.
Watering is vital for herb care. Too much or too little water can harm my herbs. I’ll learn to spot these problems and fix them.
Understanding Moisture Needs
To care for my herbs, I check the soil moisture. I stick my finger into the soil up to the first knuckle. If it’s dry, it’s time to water. If it’s moist, I wait a day or two.
Signs of Overwatering or Underwatering
Overwatering shows as yellow leaves, droopy stems, and soft soil. Underwatering causes wilted leaves, slow growth, and dry soil. Knowing these signs helps me water just right.
Here are some watering tips:
- Water herbs in the morning for better absorption
- Use a potting mix that drains well to avoid soggy soil
- Keep water off leaves to prevent diseases
Fertilizing to Boost Herbal Growth
As I grow herbs at home, I’ve found that fertilizing is key. A well-fed herbal garden for beginners can flourish with the right fertilizers. I choose the type of fertilizer and how often to use it carefully.
I use organic fertilizers for my garden. Compost, manure, and fish emulsion are my go-to choices. They’re packed with nutrients like nitrogen, phosphorus, and potassium. These are crucial for my plants to grow well.
Best Fertilizers for Herbs
- Compost: a natural, nutrient-rich fertilizer made from decomposed plant matter
- Manure: a organic fertilizer made from animal waste, rich in nutrients
- Fish emulsion: a liquid fertilizer made from fish waste, high in nitrogen and phosphorus
Timing My Fertilization Schedule
I fertilize my herbs regularly to keep them healthy. The timing depends on the fertilizer and the plant’s growth stage. I fertilize once a month with a balanced fertilizer.
By following these tips and using the right fertilizers, I’ve created a thriving herbal garden. My herbs are now healthy, flavorful, and aromatic. They’re perfect for cooking and other uses. Fertilizing is key for any gardener, whether you’re starting or experienced.
Harvesting My Herbs for Maximum Flavor
Harvesting herbs is a fun part of gardening. With the right methods, you can enjoy the best flavors from your herbs. Learning when to pick and how to cut them is key. This is where knowing how to grow herbs at home helps a lot.
Here are some tips for harvesting your herbs:
- Harvest herbs in the morning, after the dew has dried but before the heat of the day.
- Use scissors or pinch off individual leaves to avoid damaging the plant.
- Only harvest what you need, as this will encourage the plant to produce more leaves.
When to Harvest Different Herbs
Each herb has its own best time to pick. For example, basil and mint are ready when they have a few leaves. Rosemary and thyme take longer to grow. By following these tips, you’ll get the best taste and smell from your herbs.
Proper Cutting Techniques
How you cut herbs is very important. Cutting too much can hurt the plant, while too little might not taste good. By using the right cutting methods, you’ll get a lot of fresh, tasty herbs.
| Herb | Harvest Time | Cutting Technique |
|---|---|---|
| Basil | After 6-8 weeks | Pinch off individual leaves |
| Mint | After 6-8 weeks | Cut back to 1-2 inches from the ground |
| Rosemary | After 3-4 months | Cut back to 6-8 inches from the ground |
Common Pests and Diseases to Prevent
Indoor herb gardening brings many joys, but pests and diseases can be a big problem. To keep my herbs healthy, I must watch out for common pests and diseases. Growing herbs indoors means being careful and ready to prevent these issues.
Common pests include spider mites, mealybugs, and aphids. I check my plants often for signs like white patches, sticky droplets, or actual bugs on leaves.
Identifying Pests in My Garden
- Spider mites: Look for fine webbing on the leaves and white powdery patches.
- Mealybugs: Check for white, cottony patches on the stems and leaves.
- Aphids: Inspect for small, soft-bodied insects on the leaves and stems.
Natural Remedies for Pest Control
To fight pests, I use natural solutions like neem oil, insecticidal soap, and horticultural oil. These are safe for my plants and the planet. By being proactive, I can keep my indoor herb garden healthy and thriving. This way, I can keep enjoying the perks of growing herbs indoors.
Preserving Herbs for Year-Round Use
As a beginner in herb gardening, I’ve learned that preserving my herbs is key. This way, I can enjoy them all year. I’ll share my favorite methods for keeping herbs fresh, like drying and freezing.
Drying Methods
Drying is a simple and effective way to keep herbs fresh. I use a few methods:
- Air drying: I tie herbs in small bunches and hang them upside down in a warm, dry spot.
- Oven drying: I put herbs on a baking sheet and dry them in a low-temperature oven.
- Dehydrator: I use a dehydrator to dry herbs quickly and evenly.
Freezing Techniques
Freezing is another great way to preserve herbs. I chop them finely and freeze them in ice cube trays or airtight containers. This makes it easy to add them to my favorite dishes all year.
By following these simple steps, you can enjoy your homegrown herbs all year. Whether you’re new to herb gardening or experienced, proper care at home will help. You can keep your herbs fresh and add flavor to your meals.
My Favorite Recipes Using Homegrown Herbs
I’m excited to share my favorite recipes that highlight homegrown herbs. These dishes are quick, easy, and full of flavor. You’ll find inspiration for using fresh herbs in these tasty recipes.
Quick and Easy Herb-Infused Dishes
I often make a simple pasta dish with my homegrown herbs. I mix fresh basil, oregano, and parsley with olive oil, garlic, and Parmesan. It’s a burst of flavor in every bite.
For a light summer salad, I combine arugula, cherry tomatoes, and a tangy vinaigrette. The vinaigrette is made with my homegrown herbs.
Creative Ways to Use Fresh Herbs
I enjoy trying new things with my herbs. I infuse simple syrups with rosemary or mint for cocktails. I also blend cilantro and lime for a zesty pesto.
This pesto is great with grilled fish or chicken. The possibilities are endless with a thriving herb garden.