I’ve been gardening for years, and DIY raised garden beds have changed my game. These simple structures have turned my backyard into a lush oasis. Here, I’ll share my journey and guide you to create your own garden paradise.
Raised bed gardening brings many benefits. It’s easier to manage soil, cut down on weeding, and grow longer seasons. Plus, it’s great for my back! Whether you’re new or experienced, I’ll cover all you need to know about DIY raised garden beds.
Get ready to get your hands dirty! By the end of this guide, you’ll have the tools and knowledge to create a thriving raised bed garden. Let’s start growing!
Why I Love DIY Raised Garden Beds
I’ve fallen in love with DIY raised garden beds. They’ve changed my gardening for the better, making it fun and productive. Let me tell you why I love them and how they can change your backyard too.
Benefits of Raised Garden Planters
Raised garden planters bring many benefits to gardening:
- Better soil control
- Improved drainage
- Fewer weeds
- Extended growing season
- Easier on your back and knees
My Personal Experience
I began with one small raised bed three years ago. Now, I have six gardens thriving. The ease of building them let me grow my garden quickly. My vegetable yields have doubled, and I’m growing new varieties.
Cost-Effectiveness of DIY Solutions
Building your own raised beds is surprisingly affordable. Here’s a cost comparison of DIY vs. pre-made options:
| Item | DIY Cost | Pre-made Cost |
|---|---|---|
| 4×8 ft Cedar Bed | $60 | $200 |
| Soil Mix (2 cubic yards) | $80 | $80 |
| Hardware | $15 | Included |
| Total | $155 | $280 |
DIY raised garden beds are rewarding and budget-friendly. They let you customize to fit your space perfectly. With simple techniques, you’ll have a thriving garden in no time.
Choosing the Right Location for My Garden
Finding the perfect spot for my vegetable garden beds is crucial for a great harvest. Several important factors influence this choice.
Sunlight Requirements
Most vegetables need at least 6 hours of direct sunlight each day. I observe the sun’s movement to find the sunniest spots. Leafy greens can tolerate some shade, but tomatoes and peppers need full sun.

Accessibility Considerations
I choose a spot for my wooden garden beds that’s easy to reach. This makes watering, weeding, and harvesting simple. I also keep a water source close and ensure paths are wide enough for wheelbarrows.
Soil Quality Assessment
Even with raised beds, the quality of the soil is important. I test my soil’s pH and nutrient levels every year. If the soil is poor, I know my raised beds will need extra care and soil amendments.
| Soil Type | pH Level | Best for |
|---|---|---|
| Sandy | 6.0-6.5 | Root vegetables |
| Loamy | 6.3-6.8 | Most vegetables |
| Clay | 6.5-7.0 | Leafy greens |
By considering these factors, I ensure my vegetable garden beds are set up for success. The right location is key to a successful gardening journey.
Materials I Need for My Raised Garden Beds
Choosing the right materials is crucial for durable elevated garden beds. Quality materials are key to the success and longevity of grow boxes. Let’s look at the best options for building strong and lasting raised beds.
Types of Wood for Longevity
I always choose cedar or redwood for my raised garden beds. These woods naturally resist rot and decay, lasting many seasons. Here’s a comparison of wood types I’ve used:
| Wood Type | Durability | Cost | Availability |
|---|---|---|---|
| Cedar | High | Moderate | Widely available |
| Redwood | Very High | High | Less common |
| Pine | Low | Low | Very common |
Alternatives to Traditional Materials
I’ve tried alternative materials for my grow boxes. Recycled plastic lumber is durable and eco-friendly. Concrete blocks offer a sturdy option for a more industrial look. These alternatives are great for unique elevated garden beds.

Essential Tools for Building
Building my raised garden beds needs a few key tools. Here’s what I always have on hand:
- Drill with screwdriver bits
- Saw (circular or hand saw)
- Measuring tape
- Level
- Hammer
- Safety gear (goggles and gloves)
With these materials and tools, I’m ready to start building my raised garden beds. The right choices make gardening more enjoyable and successful.
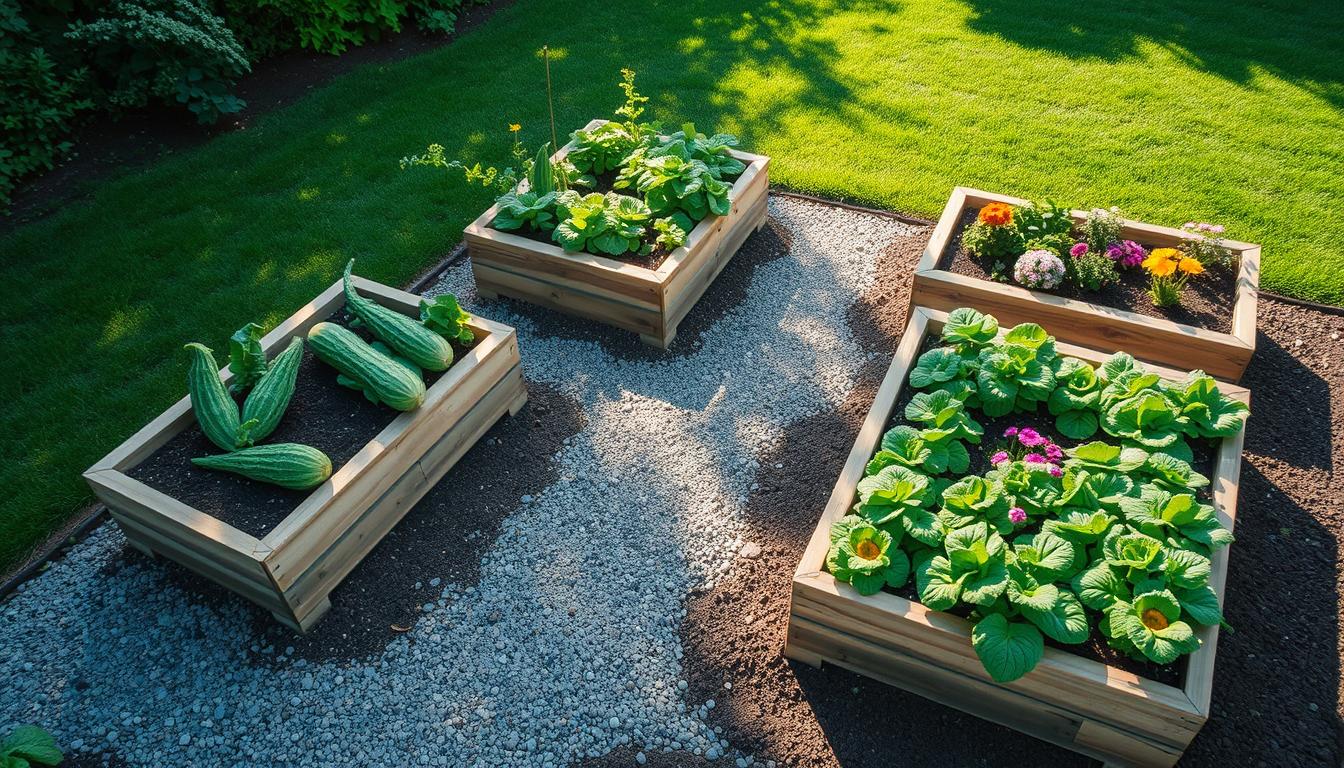
Designing My Raised Garden Bed
I enjoy making my garden beds unique. It’s a fun way to blend style and function in my backyard. Here are some ideas I’ve tried that might inspire you too.
Size and Shape Options
I’ve tried different sizes and shapes for my garden beds. Square beds are perfect for small spaces. Longer rectangles fit well along fences. I even tried a U-shaped design for easy plant access.
Budget-Friendly Design Ideas
You don’t have to spend a lot on garden beds. I’ve used old wooden pallets for rustic beds. Cinder blocks are also affordable and sturdy. My favorite trick is using fallen logs as natural borders.
Adding Aesthetic Appeal
I like making my garden beds look good and work well. Painting wooden beds adds color. Trellises for climbing plants add vertical interest. Decorative stones or glass beads around the edges give a polished look without spending much.
The best garden bed designs mix practicality with your style. Don’t be afraid to get creative and make your raised beds uniquely yours!
Step-by-Step Instructions for Building My Raised Bed
I love making DIY raised garden beds. They’re perfect for growing veggies and herbs in your backyard. Let me show you how I do it. It’s simpler than you might think!
Preparing the Area
I start by choosing a sunny spot in my yard. Then, I remove any grass or weeds and level the ground. This makes a solid base for my garden bed. I use a shovel and rake for the job.

Constructing the Frame
Now, it’s time for the fun part – building the garden bed! I choose cedar boards because they last long. I cut them to size and screw them together to make a rectangle. Here’s the size I prefer:
| Dimension | Measurement |
|---|---|
| Length | 8 feet |
| Width | 4 feet |
| Height | 1 foot |
Filling the Bed with Soil
Finally, I fill my bed with good soil. I mix topsoil, compost, and peat moss in equal parts. This mix gives my plants the nutrients they need. I add the soil in layers, watering each layer as I go.
And that’s it! My DIY raised garden bed is ready for planting. It’s a simple project that brings big rewards when harvest season comes.
Choosing the Best Soil Mix for My Plants
I’ve learned that the key to successful raised bed gardening lies in the soil mix. Creating the perfect blend for my vegetable garden beds has been a game-changer. Let me share what I’ve discovered about crafting the ideal growing medium.
Components of a Good Soil Mix
My go-to soil mix for raised bed gardening combines equal parts topsoil, compost, and vermiculite. This blend provides excellent drainage, nutrient retention, and aeration. I’ve found that this mix works wonders for most vegetables and herbs in my garden beds.

Adding Nutrients to My Soil
To boost fertility, I incorporate organic matter into my soil mix. I use well-rotted manure, leaf mold, and homemade compost. These additions enrich the soil and support healthy plant growth in my vegetable garden beds.
Testing Soil pH
Regular pH testing is crucial for raised bed gardening success. I use a simple home testing kit to check my soil’s pH levels. Most vegetables thrive in slightly acidic soil with a pH between 6.0 and 7.0. If needed, I adjust the pH using lime to raise it or sulfur to lower it.
| Soil Component | Purpose | Proportion |
|---|---|---|
| Topsoil | Base material | 1/3 |
| Compost | Nutrient source | 1/3 |
| Vermiculite | Improves drainage | 1/3 |
By focusing on these soil essentials, I’ve created a thriving environment for my plants. This approach has significantly improved my raised bed gardening experience and the quality of my vegetable harvests.
Selecting Plants for My Raised Garden Bed
Choosing the right plants for my raised garden planters is a fun and important step. I’ve learned that certain combinations can boost growth and keep pests away. Let me share some tips on picking and arranging plants in my grow boxes for the best results.
Companion Planting Techniques
I love using companion planting in my raised garden planters. It’s like matchmaking for plants! Here are some winning pairs I’ve tried:
- Tomatoes and basil
- Carrots and onions
- Beans and corn
- Lettuce and radishes
Suitable Vegetables and Herbs
My grow boxes are perfect for many veggies and herbs. Some of my favorites include:
| Vegetables | Herbs |
|---|---|
| Tomatoes | Basil |
| Peppers | Oregano |
| Lettuce | Cilantro |
| Carrots | Thyme |
Plant Spacing Considerations
Proper spacing is key in raised garden planters. I make sure to give each plant enough room to grow. For example, I space tomatoes about 24 inches apart, while herbs like basil need only 6-12 inches. This helps my plants thrive without competing for resources.
By following these tips, I’ve created a thriving garden in my grow boxes. It’s amazing to see how much I can grow in a small space with the right planning!
Maintenance Tips for My Raised Garden Beds
Keeping my elevated garden beds in top shape is key to a bountiful harvest. I’ve learned that consistent care makes all the difference. Let me share some tips that have worked wonders for my wooden garden beds.
Watering Guidelines
I water my raised beds deeply but less often. This encourages roots to grow deep and strong. In hot weather, I check the soil moisture daily. If it’s dry an inch below the surface, it’s time to water.
Weeding Strategies
Weeding is easier in raised beds. I pull weeds when they’re small and the soil is damp. Mulching with straw or wood chips helps keep weeds at bay. I also plant densely to shade out weed seedlings.
Pest Control Methods
I prefer organic pest control for my wooden garden beds. Companion planting has been a game-changer. Marigolds deter many pests, while basil keeps mosquitoes away. For stubborn bugs, I use a soap spray or pick them off by hand.
| Pest | Control Method |
|---|---|
| Aphids | Ladybugs, neem oil |
| Slugs | Copper tape, beer traps |
| Caterpillars | BT spray, hand-picking |
By following these maintenance tips, I keep my elevated garden beds thriving all season long. It’s rewarding to see healthy plants and enjoy a plentiful harvest from my wooden garden beds.
Seasonal Preparations for My Garden Beds
To keep my DIY raised garden beds thriving all year, I plan ahead. Each season has its own tasks to keep my garden healthy. Here’s how I care for my raised beds through the seasons.
Preparing for Spring Planting
With winter ending, I’m eager for spring. First, I inspect my garden bed materials for winter damage. Then, I focus on soil preparation:
- Test soil pH and adjust if needed
- Add fresh compost to replenish nutrients
- Loosen soil to improve aeration
Fall Cleanup Steps
In autumn, I clean up my raised beds with these steps:
- Remove spent plants and weeds
- Add a layer of compost
- Plant cover crops to protect soil
- Clean and store garden tools
Winterizing My Raised Beds
To protect my DIY raised garden beds in winter, I:
- Apply a thick layer of mulch
- Install cold frames for tender plants
- Cover beds with row covers or plastic sheeting
- Check drainage to prevent water pooling
| Season | Key Tasks | Materials Needed |
|---|---|---|
| Spring | Soil testing, amending | Compost, pH test kit |
| Fall | Cleanup, cover cropping | Cover crop seeds, rake |
| Winter | Protection, insulation | Mulch, cold frames |
Troubleshooting Common Issues
As a keen gardener, I’ve dealt with many raised bed gardening problems. Here are some practical solutions I’ve found.
Dealing with Soil Drainage Problems
Poor drainage can harm your plants. I mix sand or perlite into my soil to help. For severe cases, I’ve put in drainage pipes at the bottom of my raised beds. This effort leads to healthier plants and better harvests.
Managing Plant Diseases
Preventing diseases is crucial. I rotate my crops and ensure they’re well-spaced. When diseases occur, I use organic treatments like neem oil or copper fungicides. These methods protect my plants without harsh chemicals.
Preventing Pest Infestations
Pests can quickly damage a garden. I use companion planting, like marigolds, to keep pests away. For tough infestations, I use floating row covers or handpick pests. These methods keep my raised beds productive and pest-free.
By addressing these common issues, I’ve made my gardening more enjoyable and rewarding. With these tips, you’ll be ready to face any challenges your garden may have.
My Favorite Raised Garden Bed Inspiration
I’ve discovered many great ideas for my garden beds over the years. Here are some of my favorites that have helped me make beautiful raised garden planters.
Books and Resources I Recommend
“All New Square Foot Gardening” by Mel Bartholomew is my top pick. It’s full of tips for making the most of your raised beds. “The Vegetable Gardener’s Bible” by Edward C. Smith is also a favorite. It offers lots of advice on planting.
Online Communities and Forums
I’m always on GardenWeb forums, talking with other gardeners about designs. The r/gardening subreddit is also a favorite. It’s where I share photos and get feedback on my projects.
Garden Tours and Local Inspiration
I always go to the annual garden tour in my town. It’s a chance to see amazing raised garden planters. My local community garden is also a source of inspiration. I take photos of clever designs to try at home.