I’m excited to share my journey of starting a herb garden. As a novice, I’ve learned that herb gardening is rewarding. It brings fresh flavors to my kitchen. In this guide, I’ll walk you through the steps I took to create my own thriving herb garden.
From choosing the perfect spot to harvesting aromatic herbs, I’ll cover everything you need to know. Whether you have a spacious backyard or a tiny balcony, I’ll show you how to start a herb garden that fits your space and lifestyle. Let’s dive into the world of herb gardening together!
Why I Want to Grow a Herb Garden
Growing herbs has become my new passion. I’m excited to share why I’ve decided to start my own herb garden. It’s changing my life for the better. Whether you’re thinking about an indoor herb garden or an outdoor one, there are many reasons to try it.
The Benefits of Fresh Herbs
Fresh herbs are a game-changer in the kitchen. They add incredible flavor to my dishes and help me cut down on salt and unhealthy seasonings. I love being able to snip a few leaves of basil or sprigs of thyme whenever I need them.
It’s not just about taste, though. Growing herbs has surprising health benefits:
- Packed with vitamins and antioxidants
- Can boost immunity and reduce inflammation
- Some herbs have natural stress-relieving properties
Personal Inspiration for Gardening
My journey into herb gardening started when I tasted a friend’s homemade pesto. The freshness was unbeatable. I realized I could have that same experience at home.
Now, tending to my little green friends has become a relaxing ritual. It’s satisfying to watch them grow and know that I’m nurturing something useful and beautiful.
| Herb | Culinary Use | Health Benefit |
|---|---|---|
| Basil | Pesto, Italian dishes | Anti-inflammatory |
| Mint | Teas, desserts | Aids digestion |
| Rosemary | Roasted meats | Improves memory |
Starting an herb garden has been rewarding in ways I never expected. It’s not just about having fresh ingredients on hand. It’s about connecting with nature and finding joy in nurturing life.
Whether you have a spacious backyard or just a sunny windowsill, I encourage you to give herb gardening a try.
Choosing the Right Location for My Herb Garden
Finding the perfect spot for my herb garden is crucial. I must think about sunlight, how easy it is to get to, and how it looks in my outdoor area. A well-thought-out layout can greatly improve both the health and look of my herbs.
Sunny Spots vs. Shady Areas
Most herbs prefer sunlight, but some can handle shade. I’ll put sun-loving herbs like basil and rosemary in sunny spots. For areas with partial shade, I’ll choose mint or parsley. Here’s a quick guide:
| Light Condition | Suitable Herbs | Daily Sun Exposure |
|---|---|---|
| Full Sun | Basil, Rosemary, Thyme | 6+ hours |
| Partial Shade | Mint, Parsley, Cilantro | 3-6 hours |
| Full Shade | Chervil, Lemon Balm | Less than 3 hours |
Accessibility and Aesthetic Considerations
I want my herb garden to be easy to get to and look good. Putting it near the kitchen door makes it convenient. I’ll arrange the plants by height, with tall ones like dill at the back and short ones like thyme in front. Adding stepping stones between rows helps me care for my herbs without damaging the soil.
By picking the right spot and layout, I’m setting my herb garden up for success. It will be both useful and beautiful, enhancing my outdoor space and providing fresh herbs for my cooking.
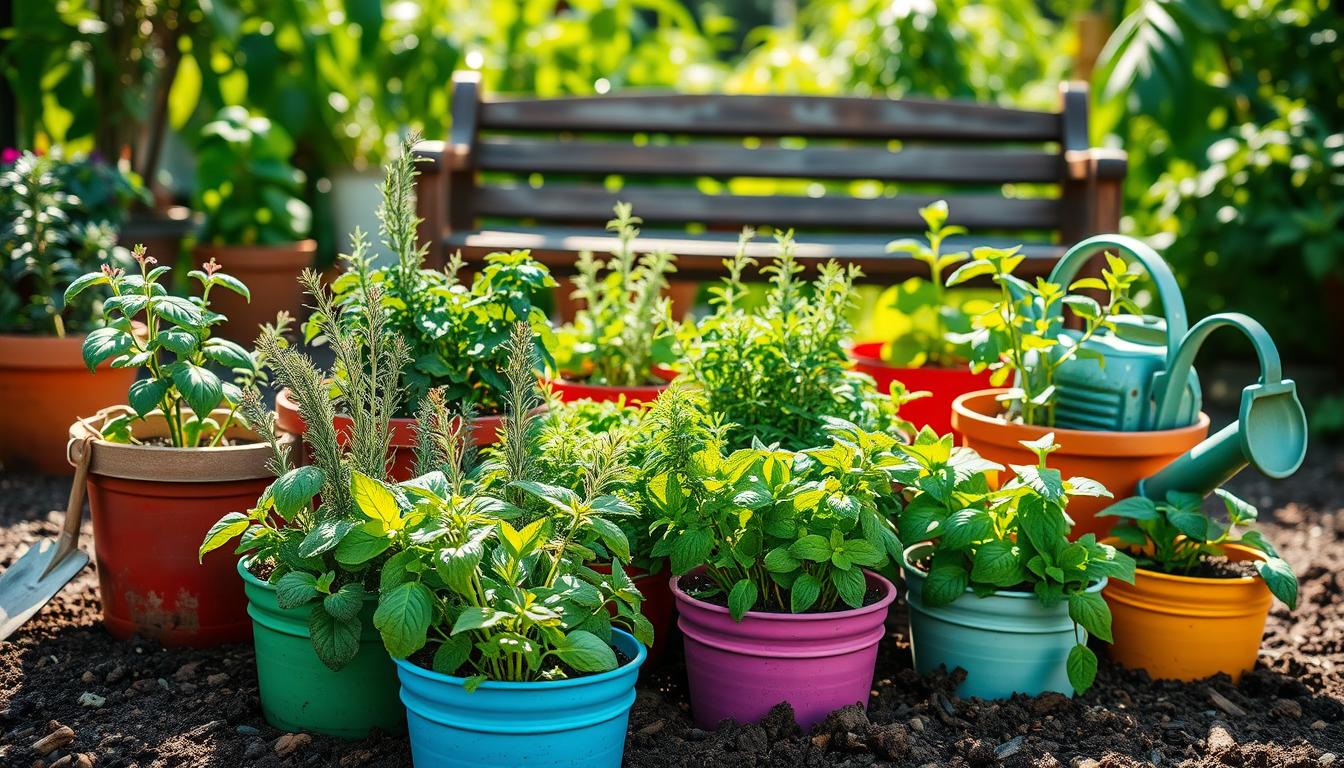
Essential Tools and Supplies I Need
Starting my herb garden is exciting, but I need the right tools and containers to make it successful. I’ve learned that proper equipment can make a big difference in my herb garden design and overall gardening experience.
Basic Gardening Tools
To get started, I’m gathering these essential tools:
- Hand trowel for planting and transplanting
- Pruning shears for harvesting and trimming
- Watering can with a gentle spray nozzle
- Garden gloves to protect my hands
- Small rake for soil preparation

Choosing the Right Containers
Selecting the perfect herb garden containers is crucial for my plants’ health and the overall look of my garden. I’m considering these options:
| Container Type | Pros | Cons |
|---|---|---|
| Terra cotta pots | Good drainage, natural look | Can dry out quickly |
| Plastic containers | Lightweight, affordable | May not be as durable |
| Window boxes | Space-saving, decorative | Limited root space |
| Raised beds | Large growing area, good drainage | Requires more space |
I’m leaning towards a mix of containers to create an interesting herb garden design. This variety will allow me to experiment with different herbs and create a visually appealing garden that fits my space perfectly.
Selecting Herbs That I Love
Choosing herbs for my garden is exciting. I enjoy trying new flavors and finding plants that match my cooking style. Here’s how I pick herbs that grow well and add to my cooking.
Popular Herbs for Beginners
At first, I grew easy herbs like basil, mint, and parsley. They’re perfect for beginners because they’re easy to care for and grow a lot. I also like chives and oregano for their unique tastes.

Culinary Uses and Flavor Profiles
Knowing about herb flavors helps me plan my garden and meals. Here’s a table of my top herbs, their tastes, and how I use them:
| Herb | Flavor Profile | Culinary Uses |
|---|---|---|
| Basil | Sweet, peppery | Pesto, Italian dishes, salads |
| Rosemary | Woody, piney | Roasted meats, soups, bread |
| Thyme | Earthy, slightly minty | Stews, marinades, poultry |
| Cilantro | Citrusy, pungent | Mexican cuisine, salsas, curries |
| Sage | Earthy, slightly peppery | Stuffings, sauces, pork dishes |
By growing a variety of herbs, my garden offers many flavors for my kitchen. Growing herbs at home lets me try new tastes and improve my cooking.
Preparing the Soil for My Herbs
The secret to a great herb garden is the soil. Good soil is key for healthy plants and tasty herbs. Let’s explore the world of soil types and how to make the best spot for my herbs.
Soil Types and Their Importance
Herbs like different soils. Most do well in well-draining, loamy soil. Here’s a quick look at common soil types and what they offer:
| Soil Type | Characteristics | Suitable Herbs |
|---|---|---|
| Sandy | Drains quickly, low in nutrients | Thyme, Rosemary, Lavender |
| Clay | Retains water, rich in nutrients | Mint, Chives, Parsley |
| Loamy | Well-draining, balanced nutrients | Most herbs |
How to Amend My Soil
Improving my herb garden soil is vital. I start by checking the soil pH, aiming for 6.0-7.0. To make the soil better, I do the following:
- Add organic matter like compost or well-rotted manure
- Mix in perlite or sand to improve drainage
- Incorporate slow-release organic fertilizers
- Use mulch to retain moisture and suppress weeds

By focusing on soil quality, I give my herbs the best start. This care in soil preparation leads to a rich and flavorful harvest.
Planting My Herb Seeds or Seedlings
I’m excited to start planting my herbs! I’m deciding between seeds or seedlings. Both have their good points, and I’ll share my experiences to help you choose.
Seed vs. Seedling: My Experience
Starting with seeds is cheaper and lets me pick from many herbs. I enjoy seeing the tiny sprouts grow! But, seedlings give me instant results and are more likely to grow well. Here’s how it went for me:
| Aspect | Seeds | Seedlings |
|---|---|---|
| Cost | Lower | Higher |
| Variety | More options | Limited selection |
| Time to harvest | Longer | Shorter |
| Success rate | Lower | Higher |
Planting Techniques for Different Herbs
I think about each herb’s needs when planting. For example, basil and cilantro like warm soil. Parsley and dill do well in cooler temperatures. I space them based on their size to make my garden efficient.

- Loosen the soil and remove weeds
- Make small holes or furrows for seeds or seedlings
- Plant seeds about 1/4 inch deep
- Gently cover with soil and water lightly
- Label each plant or row for easy identification
By using these techniques, I help my herbs start strong. This sets the stage for a garden that will flourish all season.
Watering My Herb Garden Effectively
Proper watering is essential for a healthy herb garden. It’s crucial whether you have an outdoor or indoor garden. Getting the water balance right is key.
Signs of Overwatering or Underwatering
I watch my herbs closely for signs of water stress. Yellow leaves often mean too much water. Wilting can mean not enough.
For my indoor garden, I check soil moisture by sticking my finger in. If it’s dry, it’s time to water.
Best Practices for Watering
Watering deeply but less often helps roots grow strong. For outdoor herbs, I water in the morning to reduce evaporation. In my indoor garden, I use pots with drainage holes.
I water until I see water coming out the bottom. This ensures my plants get enough water without drowning.
- Water at the base of plants to keep leaves dry
- Use room temperature water to avoid shocking the plants
- Adjust watering based on seasons and plant growth stages
By following these tips, my herb garden is thriving. I enjoy a fresh harvest of herbs all year.
Maintaining and Caring for My Herb Garden
Keeping my herb garden thriving is a bit of work, but it’s worth it. I’ve picked up some tricks for maintaining my garden. These tricks make a big difference.
Weeding and Pest Control
Weeds can quickly take over if I’m not careful. I check my garden weekly and pull weeds by hand. For pest control, I use natural methods like companion planting.
Marigolds near my herbs help repel bugs. I also spray plants with a mix of water and mild dish soap. This helps deter pests.
Fertilizing My Herbs for Optimal Growth
Proper fertilizing keeps my herbs lush and flavorful. I use organic compost tea once a month during the growing season. For container herbs, I add a slow-release organic fertilizer when planting.
Here’s my fertilizing schedule for common herbs:
| Herb | Fertilizing Frequency | Type of Fertilizer |
|---|---|---|
| Basil | Every 4-6 weeks | Liquid fish emulsion |
| Rosemary | Once in spring | Slow-release granular |
| Mint | Monthly | Compost tea |
| Parsley | Every 6-8 weeks | Balanced liquid fertilizer |
With regular weeding, natural pest control, and proper fertilizing, my garden thrives. These simple tasks keep my herbs healthy and productive all season long.
Harvesting My Herbs at the Right Time
Growing herbs is rewarding, but knowing when to harvest is key. Timing and technique are crucial for a successful harvest.
When to Pick Your Herbs
I check my herbs in the morning after the dew has dried. Before the sun gets too hot, it’s the best time. For most leafy herbs, I harvest when they have enough foliage to grow.
Basil is best picked before it flowers. For herbs grown for seeds like dill or coriander, I wait until the seeds turn brown.
Best Harvesting Methods
For leafy herbs, I use clean, sharp scissors to cut stems close to a leaf intersection. This encourages bushier growth. When harvesting herbs like thyme or rosemary, I never take more than one-third of the plant at a time.
For root herbs such as ginger, I carefully dig around the plant. I take only what I need, leaving the rest to continue growing.
Remember, regular harvesting is part of good herb gardening practice. It keeps plants productive and prevents them from getting too woody. By mastering these techniques, I ensure a steady supply of fresh herbs throughout the growing season.
Preserving My Harvested Herbs
After months of growing herbs, I’m ready to preserve my harvest. Preserving herbs lets me enjoy their flavors long after the growing season ends. I’ve found two main methods that work great: drying and freezing.
Drying vs. Freezing: What Works Best?
Drying is best for herbs with woody stems like rosemary and thyme. I hang small bunches upside down in a dark, dry spot. For tender herbs like basil and cilantro, freezing is better. I chop them up, put them in ice cube trays with a bit of water, and freeze. This keeps their fresh flavor intact.
Creative Ways to Use Preserved Herbs
I love using my preserved herbs in creative ways. Dried herbs make great homemade tea blends. I mix chamomile, mint, and lemon balm for a soothing nighttime drink. Frozen herb cubes are perfect for soups and sauces. I drop a basil cube into pasta sauce for an instant flavor boost. I’ve even started making herb-infused oils and vinegars. They’re delicious in salad dressings and marinades.
- Herb salt: Mix dried herbs with sea salt for a flavorful seasoning
- Herb butter: Blend softened butter with chopped herbs and freeze
- Pesto cubes: Freeze homemade pesto in ice cube trays for easy use
By mastering these preservation techniques, I make the most of my herb gardening efforts year-round. It’s satisfying to use herbs I’ve grown myself, even in the middle of winter.
Troubleshooting Common Herb Garden Issues
Growing herbs can be rewarding, but it’s not always easy. I’ve faced many challenges in my herb garden. Let’s look at some common problems and how to fix them.
Identifying Common Problems
In my outdoor herb garden, I’ve seen yellow leaves, wilting plants, and slow growth. These signs often mean the plants need more nutrients or water. I check the soil moisture and adjust my watering schedule.
For nutrient issues, I use a balanced organic fertilizer. It helps my herbs grow strong.
Solutions for Common Pests and Diseases
Pests can be a big problem in herb gardens. I’ve dealt with aphids, spider mites, and whiteflies. My solution is a mix of water and mild dish soap, sprayed on the plants.
For fungal diseases, I remove infected leaves and improve air flow. In my garden, marigolds help keep pests away naturally.
Prevention is important. I regularly check my herbs, keep the garden clean, and space plants well. These steps have made my garden thrive and enjoyable.